by Thorsten Libotte, Senior Consultant at BusinessCode
As a team member of BlueBox, I came into contact with this topic this year. In the past year we have expanded our BlueBox air freight application into a BlueBox cargo application by offering sea freight tracking in addition to air freight. AIS manifested itself as a new topic through the handling and evaluation of ship positions. I found this topic interesting and exciting and it fitted in with my plan to use a Raspberry Pi in a private project.
What is AIS?
The Automatic Identification System (AIS) is a positioning system used onboard ships to prevent collisions and improve safety at sea. AIS is an older technology that operates in the VHF radio band. It was introduced to prevent collisions between large ships at sea, especially when they are out of range of land-based systems.
Since 2002, the International Maritime Organisation’s (IMO) Safety of Life at Sea (SOLAS) convention requires all ships over 300 GT sailing in international traffic, as well as all passenger ships regardless of size, to have AIS Class A devices on board.
How does AIS work?
Ships are equipped with AIS transceivers that transmit information about the ship, such as its position, speed and course.
Data collection: These signals are received from ground stations along the coast or from satellites in space.
Data aggregation: The collected data is then collated and processed by organisations that specialise in maritime information. They transform the raw data into useful information.
Data analysis: Finally, users of AIS data, such as shipping companies and maritime authorities, analyse this information to monitor ship movements, improve navigational safety and manage maritime traffic. AIS is crucial in enabling ships to navigate safely and efficiently, reducing the risk of accidents at sea. When a vessel switches off its AIS, it often indicates bad intentions. This is typically done to conceal activities such as illegal fishing, smuggling or piracy.
AIS messages
To understand AIS, we need to know the different types of AIS messages. These messages can be categorised into three main types: static information, dynamic information and travel-related information.
Static information: This includes details that do not frequently change: MMSI number, IMO number, name and call sign, longitude and latitude, vessel type, location of positioning antenna.
Dynamic information: This type of information is crucial for the analysis as it captures the movements of the vessel, such as the vessel’s position alongside accuracy information, position timestamp (in UTC), course over ground (COG).
Voyage-related information: This includes details about the vessel’s voyage, such as destination, estimated time of arrival and draught. These properties are entered/changed manually by the crew. Therefore, the information may be in an unstructured form.
All this information is collected by AIS receivers and then aggregated, as described above, to provide a comprehensive picture of vessel traffic.
How to obtain AIS data
We know that AIS is used to track the movements of ships, but how can we obtain this data? AIS works by sending out radio signals. These signals can be captured by individuals if they have the right equipment. There are two main ways to collect AIS data:
Satellite networks: satellites detect the movements of vessels on the high seas.
Terrestrial receivers: These receivers, which have a range of around 40 nautical miles, record the movements of ships as they enter and leave harbours.
There are several data providers that offer AIS data. These can be commercial companies, community groups, harbour authorities or coastguards. For example, coast guards in many countries collect these signals and can make the data available.
Building the receiver
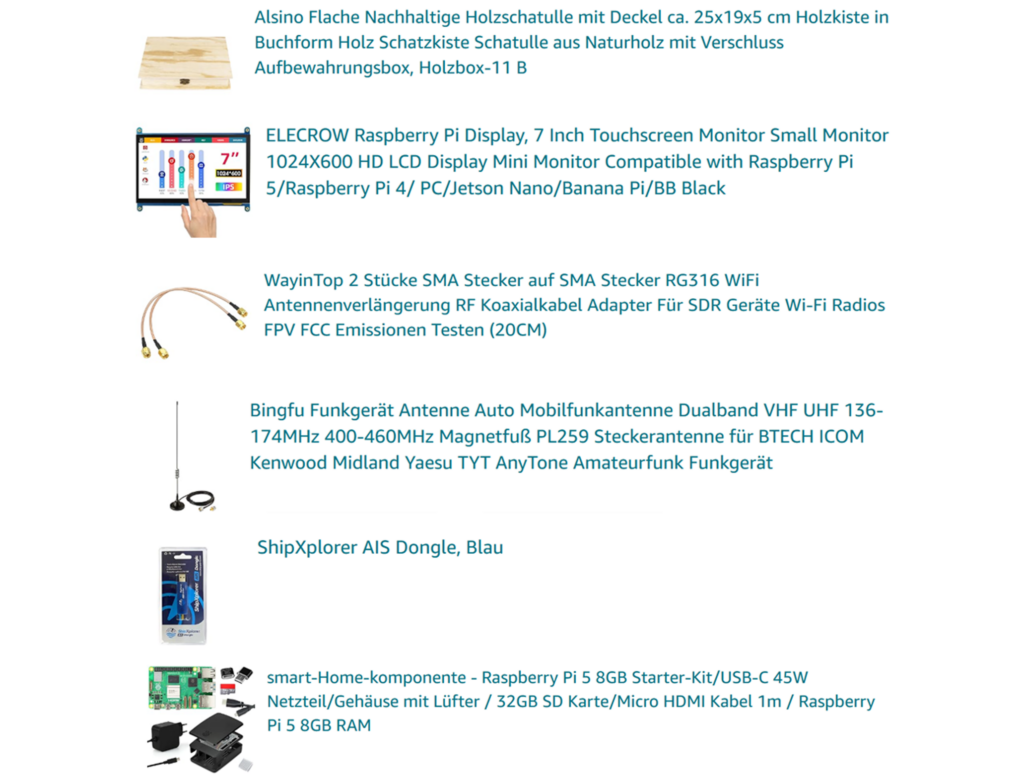
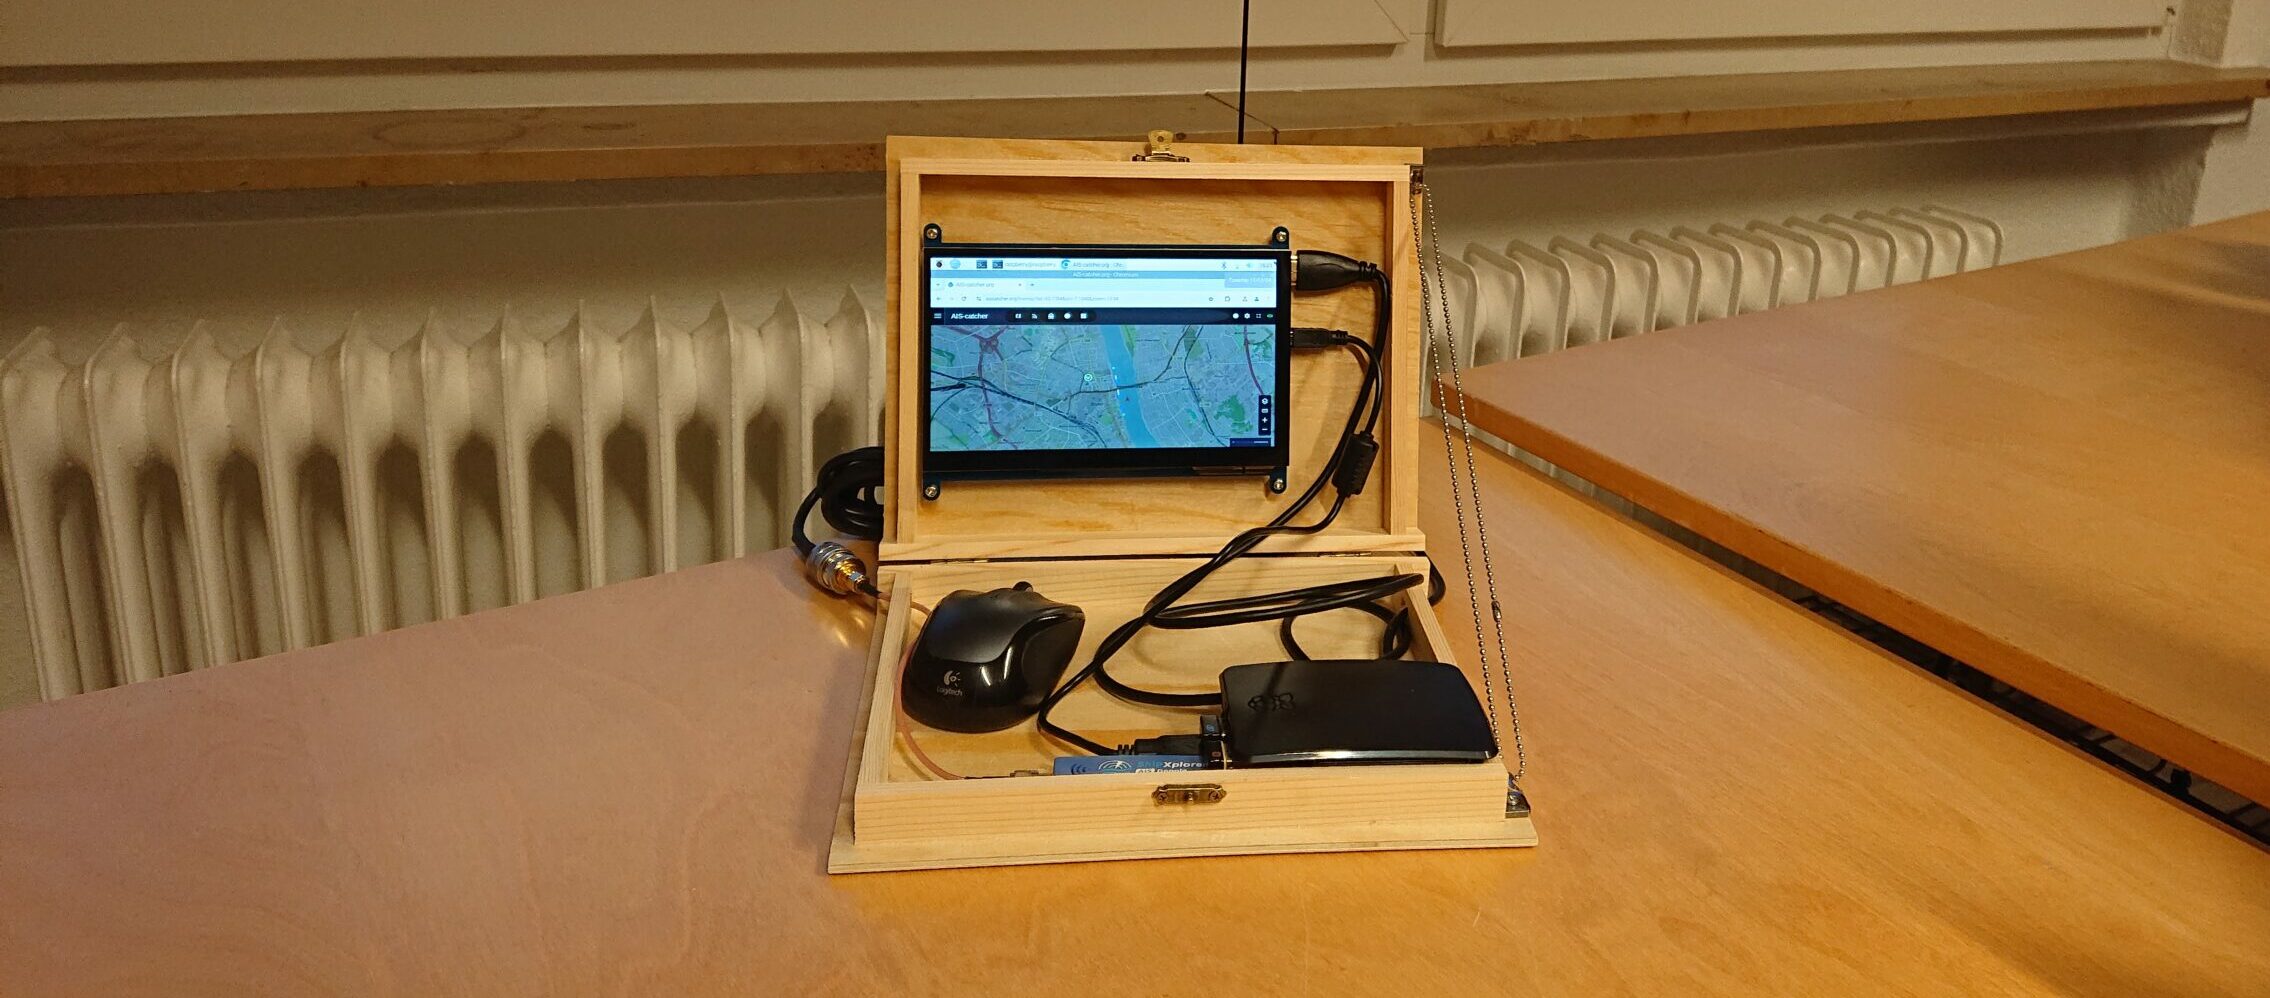
To build the receiver, I ordered the parts below and put them together by hand. I opted for the Raspberry Pi 5 model because it is already equipped with a dual-band WLAN. With the Raspberry Pi Imager, it was very easy to install an operating system on the Raspberry using an SD card. A disused wireless mouse and a wireless keyboard from private collections completed the setup. This meant that all four available USB ports were already occupied: Mouse, keyboard, power for the screen and the AIS dongle.
I wanted to have everything in a handy wooden box so that all components could be transported easily and accident-free (to the office). The biggest difficulty was getting the AIS dongle to work. I tried various programmes and then, after several failed attempts, stuck with AIS-Catcher. After a successful test phase, the receiver now sends its data to AIS-Catcher. The receiver station allows you to operate several data providers in parallel. As a ‘reward’, you usually receive a premium membership that allows you to explore the respective platform further.

